Getting to know the CamRanger - Part II

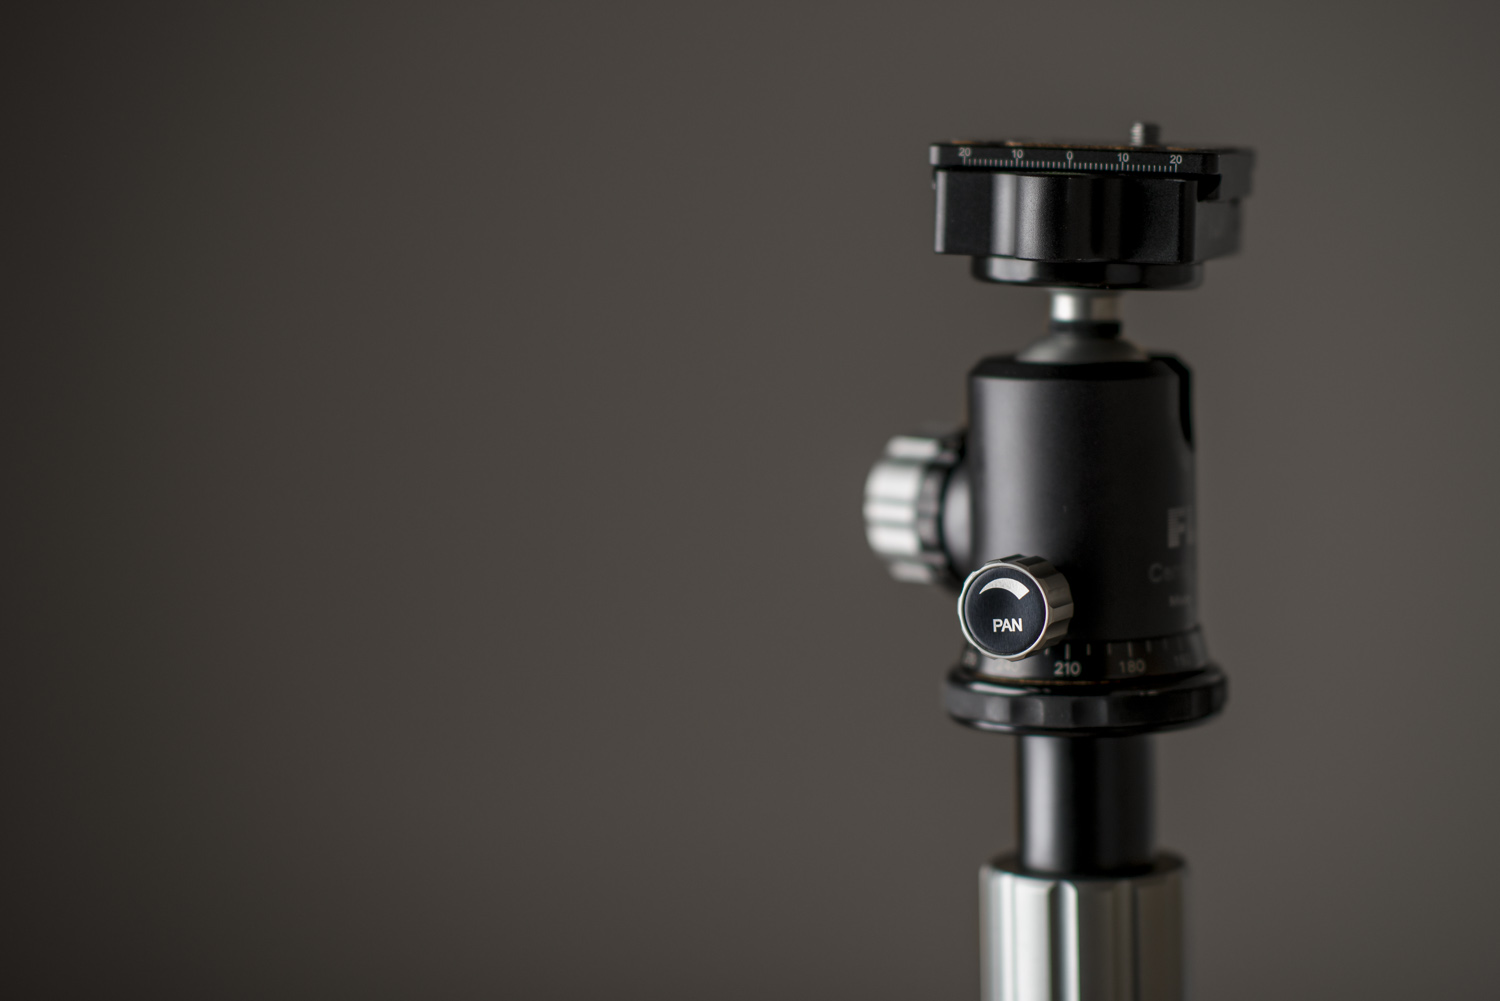
Aaaaand we're back with some more CamRanger love. The more I use this thing, the more I see the power it has. 

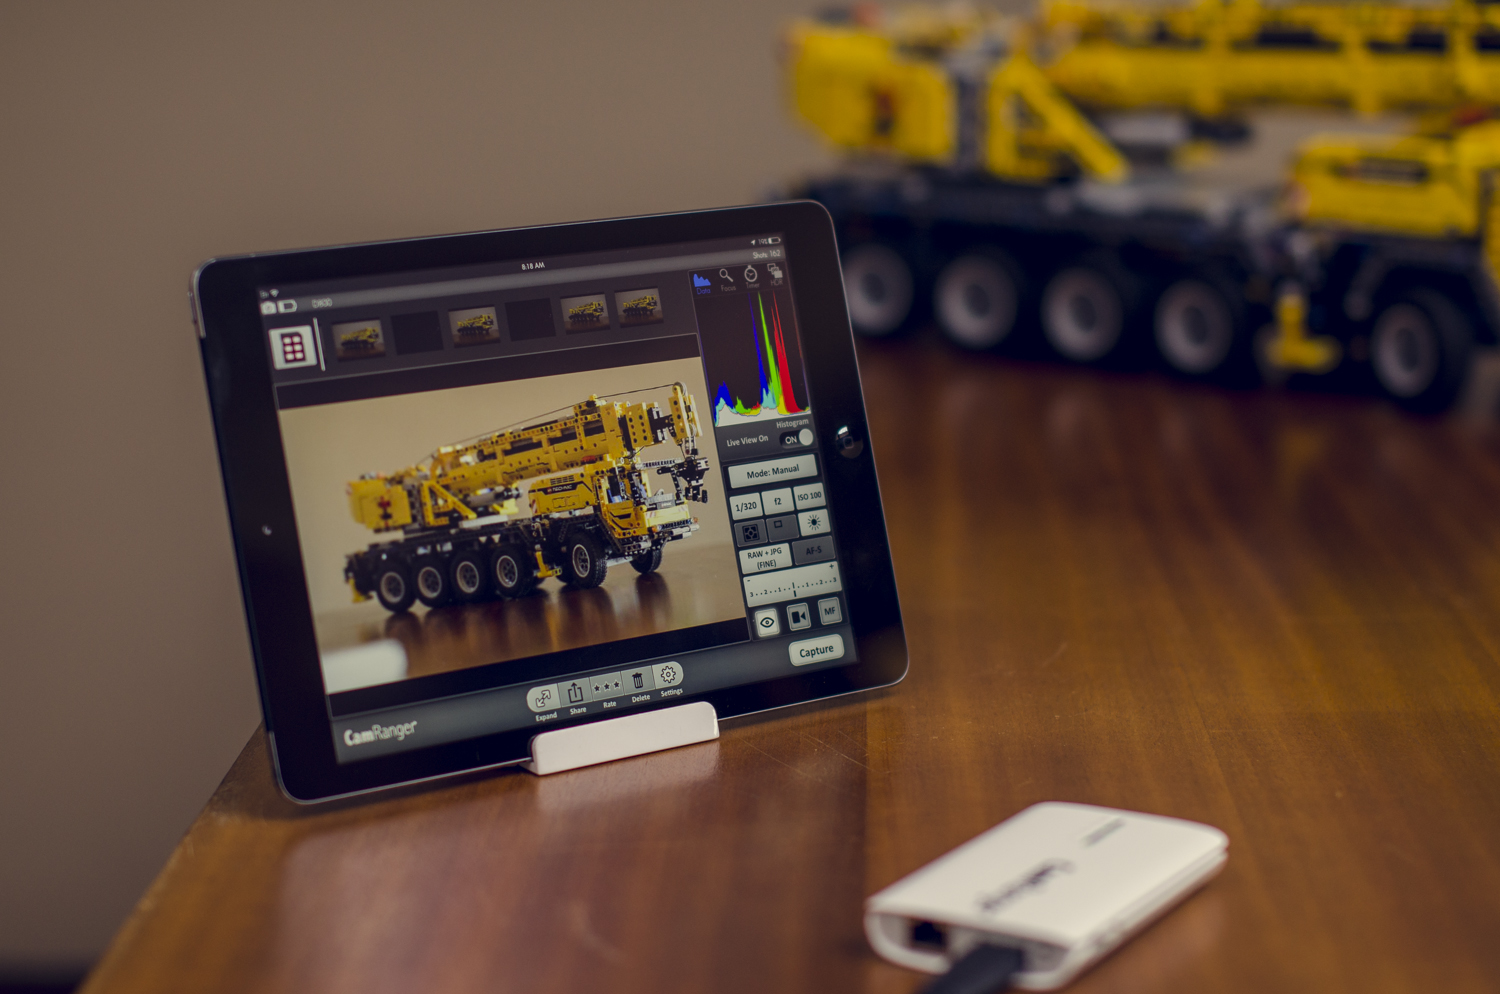
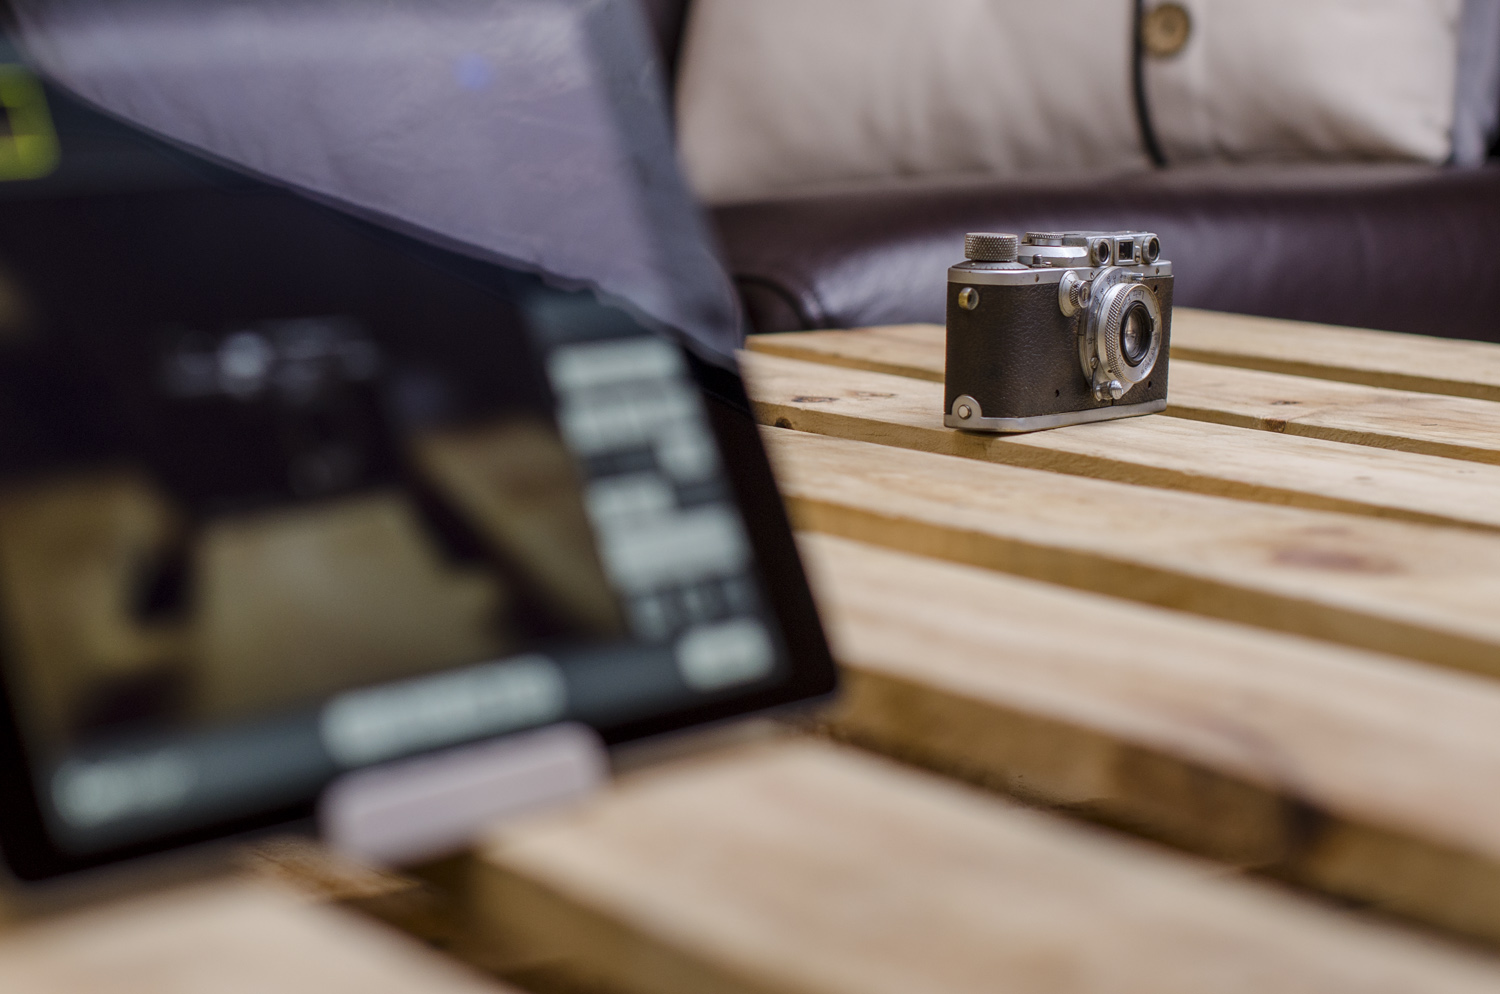
Today, I'm going into a little more detail on some of the other features the device has - specifically timelapse, focus adjustments, and HDR. Our subject today is this little Leica IIIa:

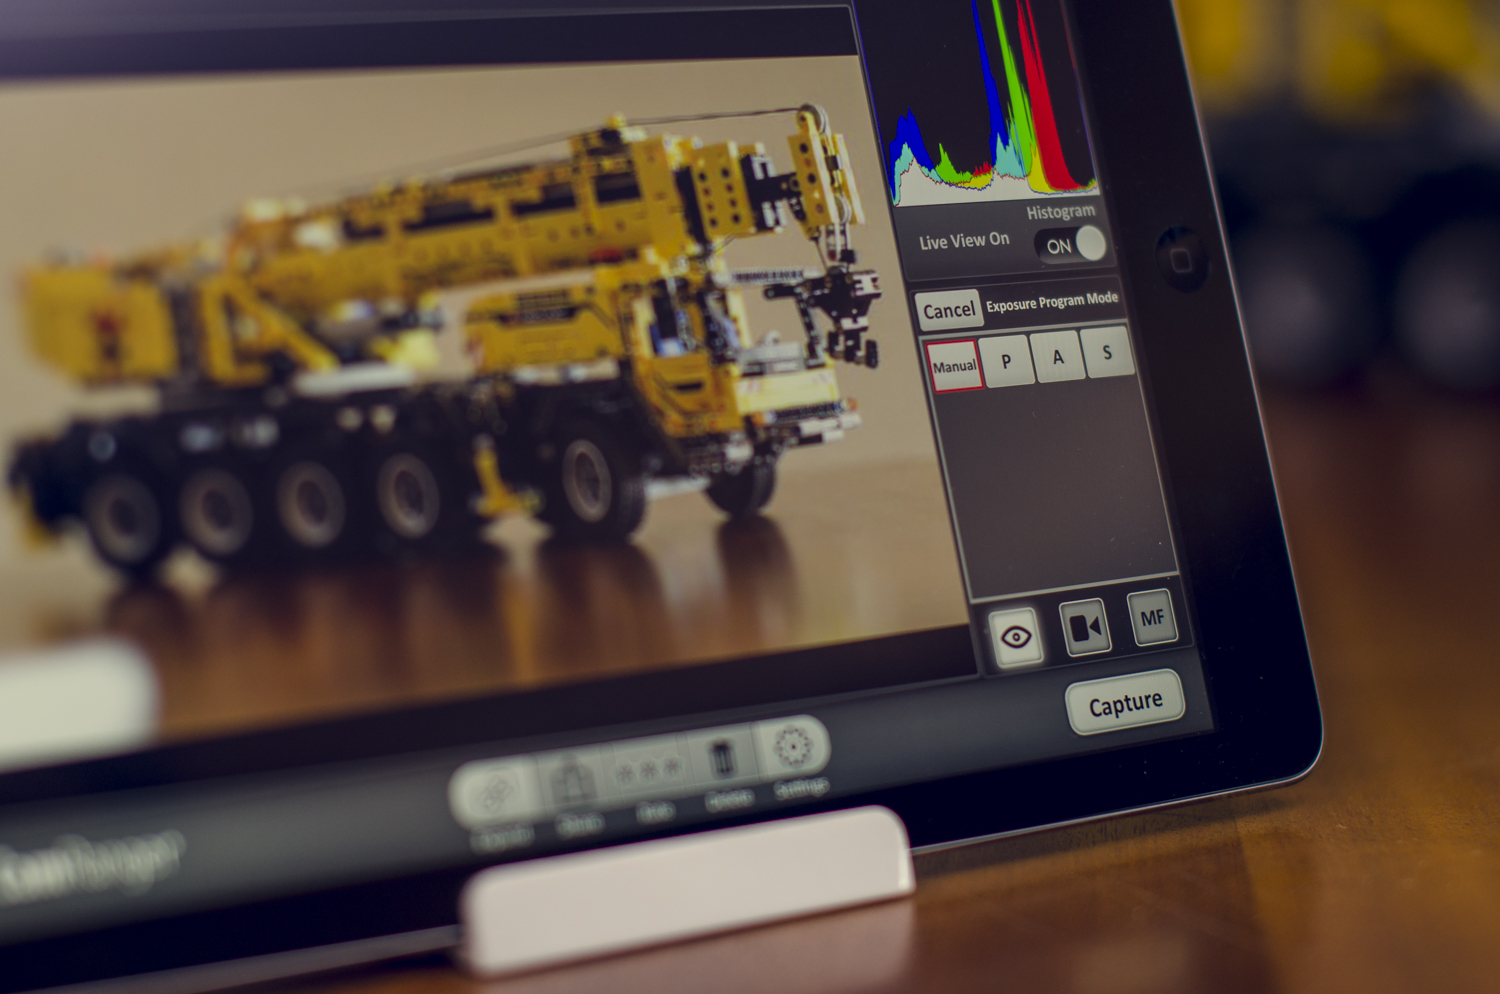
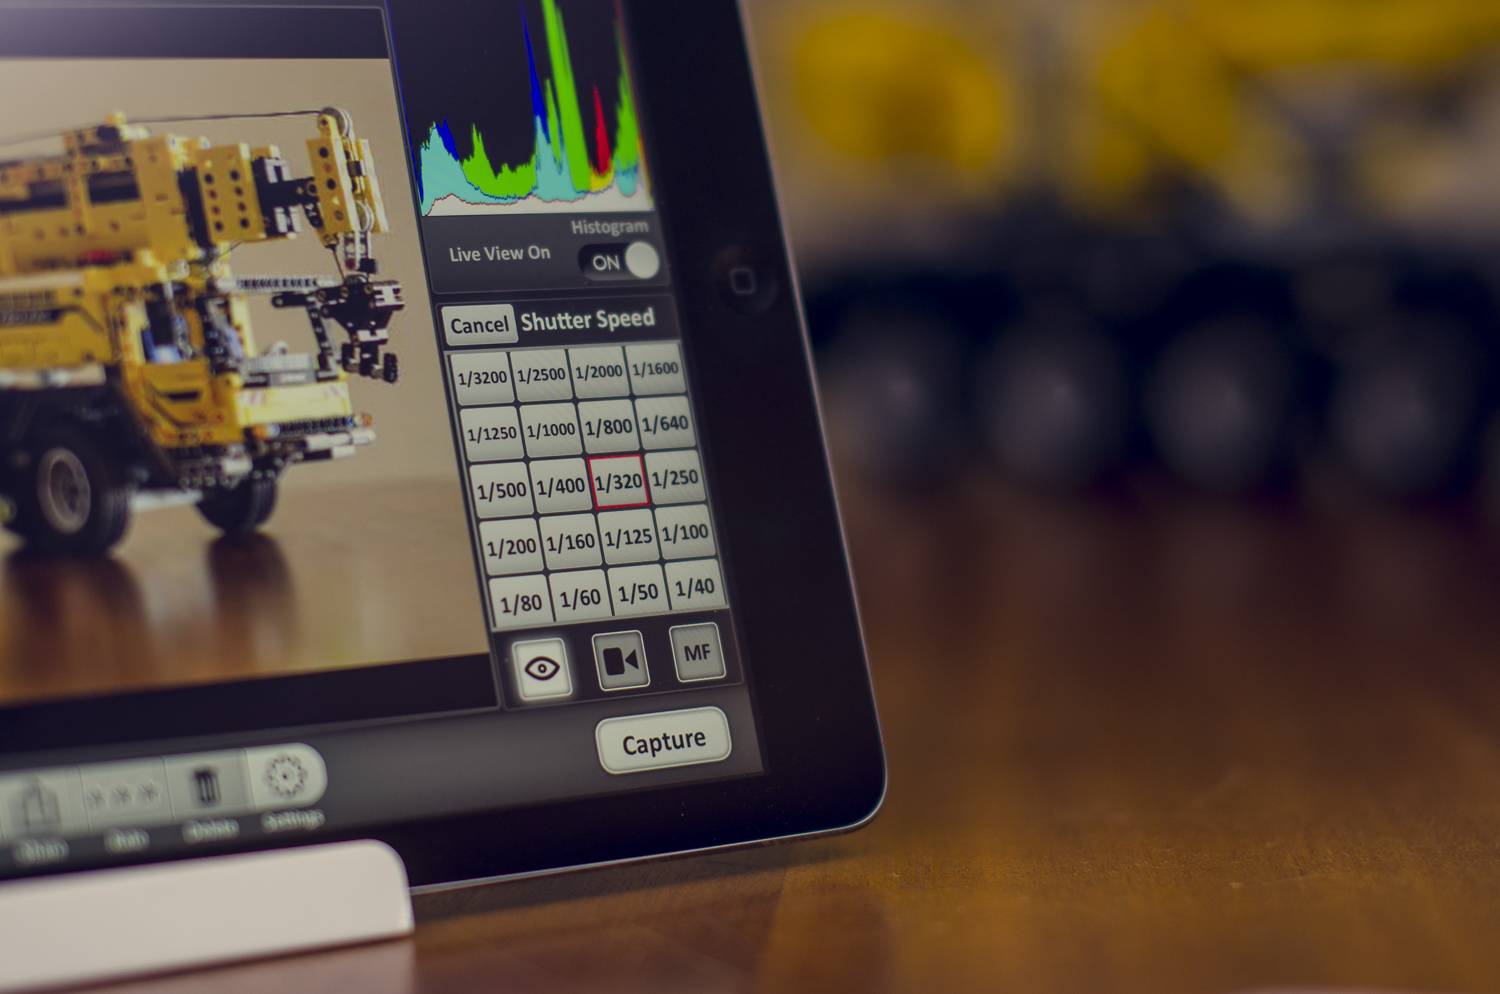
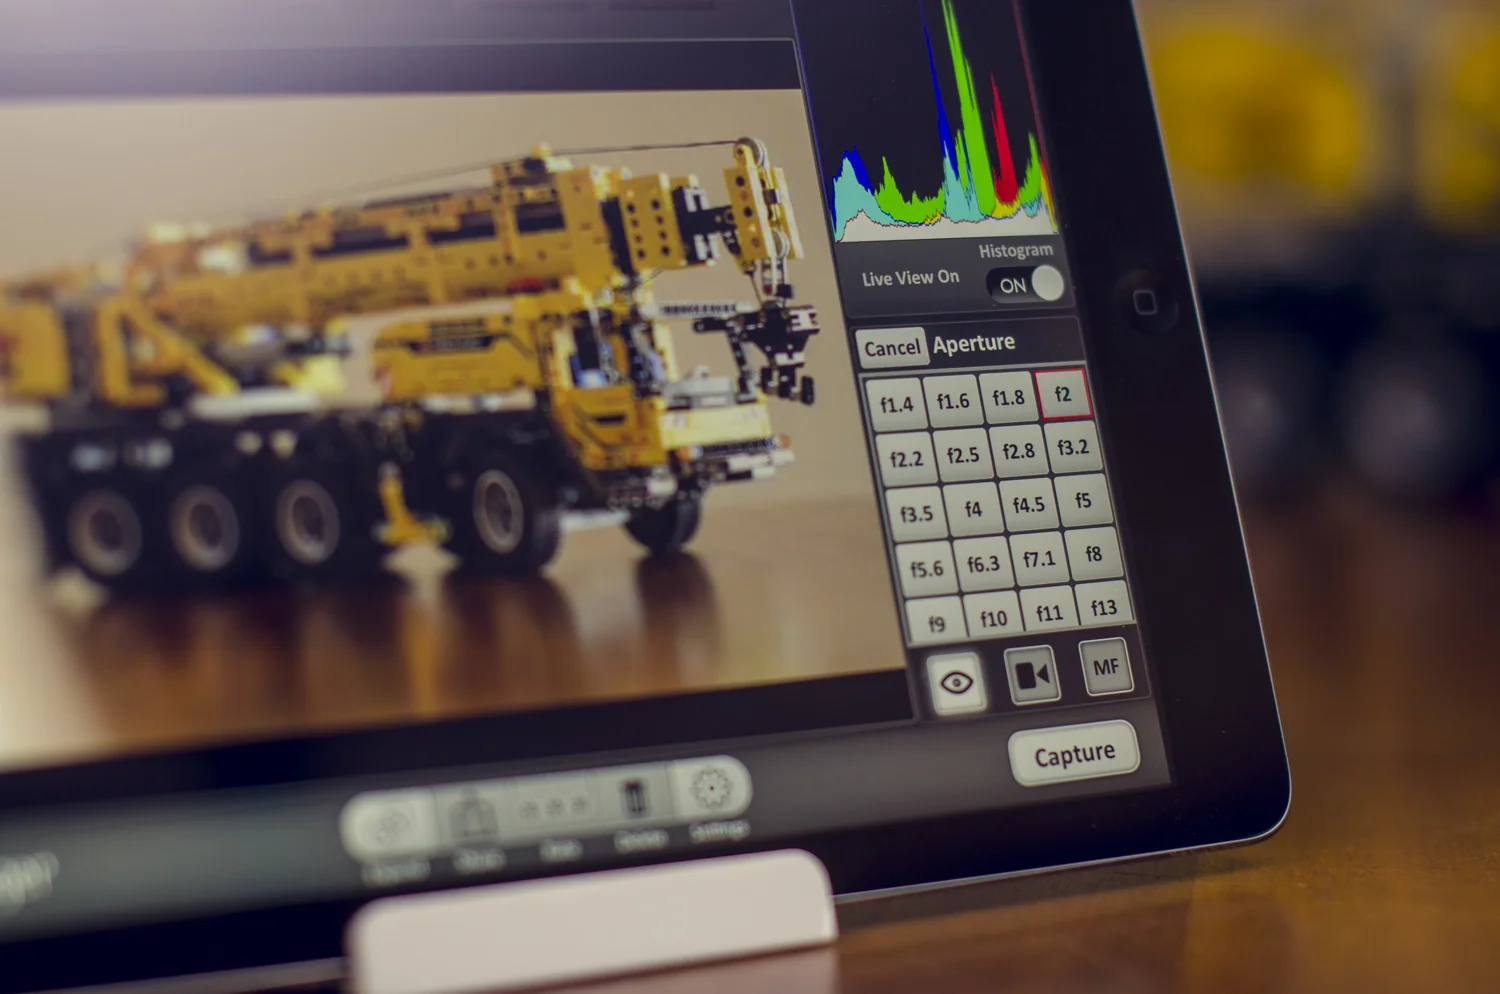
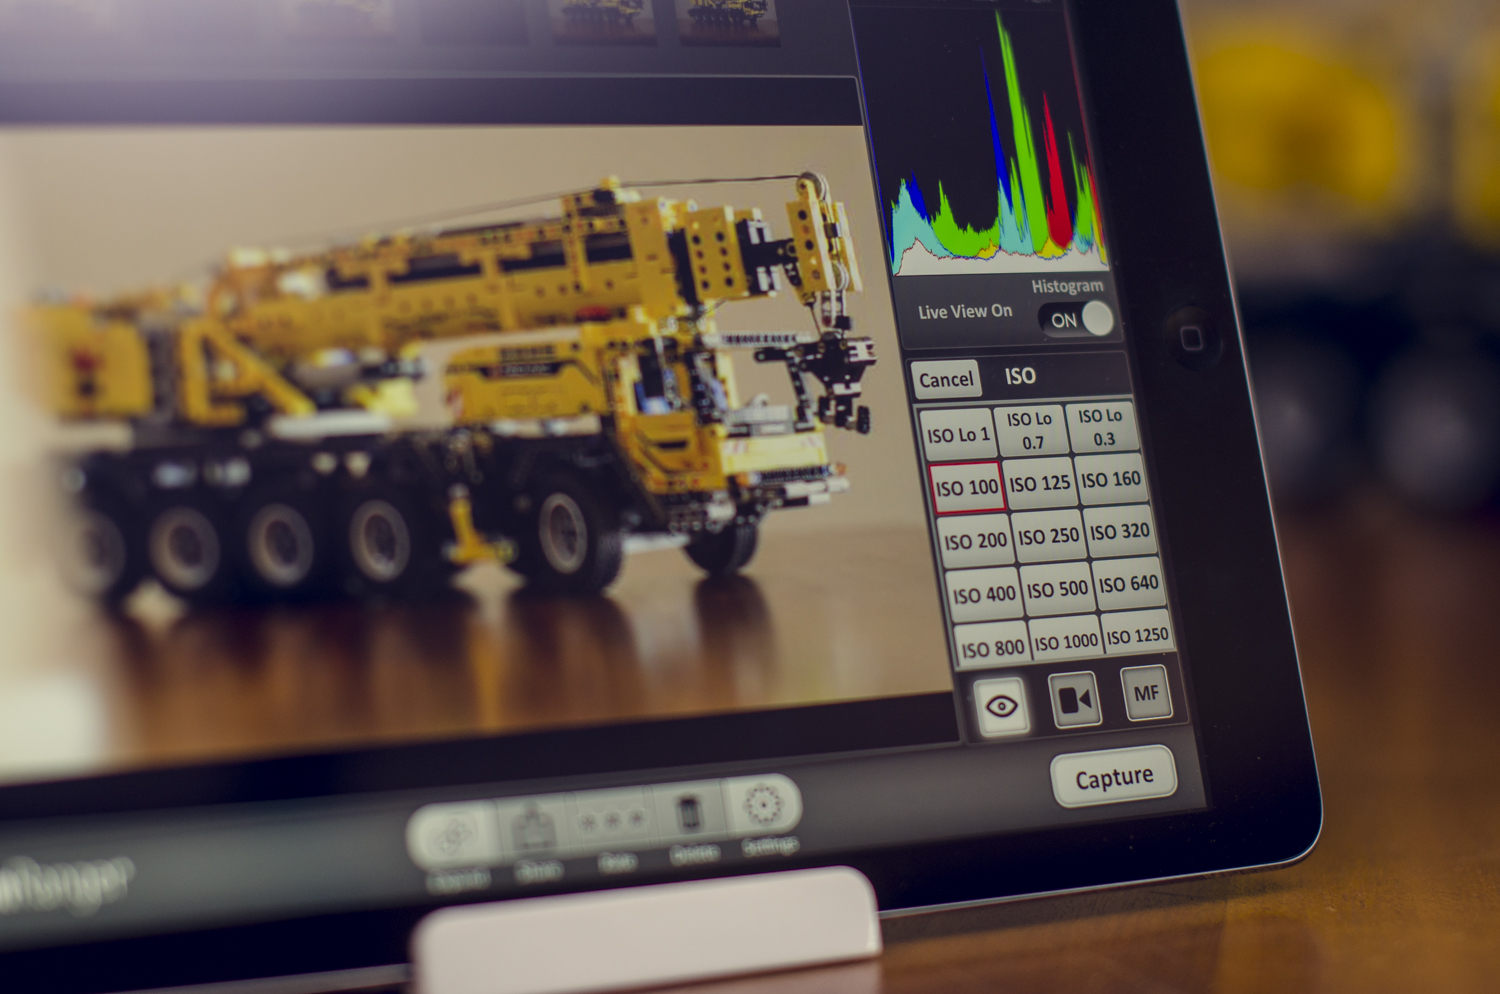
Let's get started with the Focus adjustments. The finer focus adjustments are probably my favourite feature of the CamRanger. Once you've got your shot set up, and your focused on your subject (by simply tapping anywhere on your iPhone/iPad screen), you can then further adjust that focus with these controls:

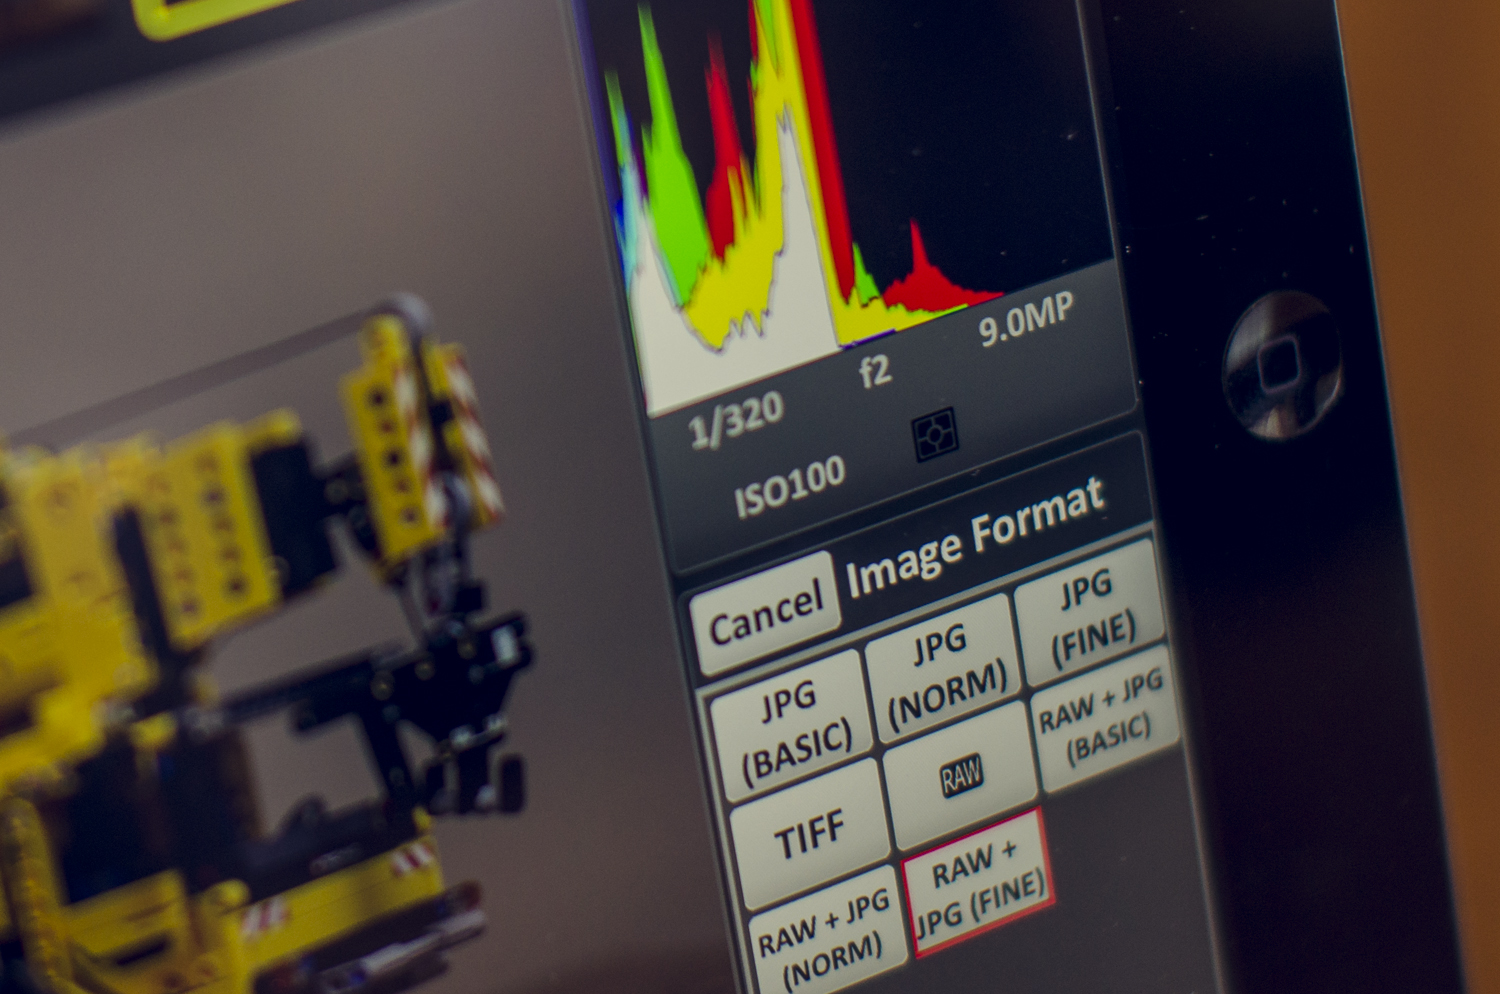
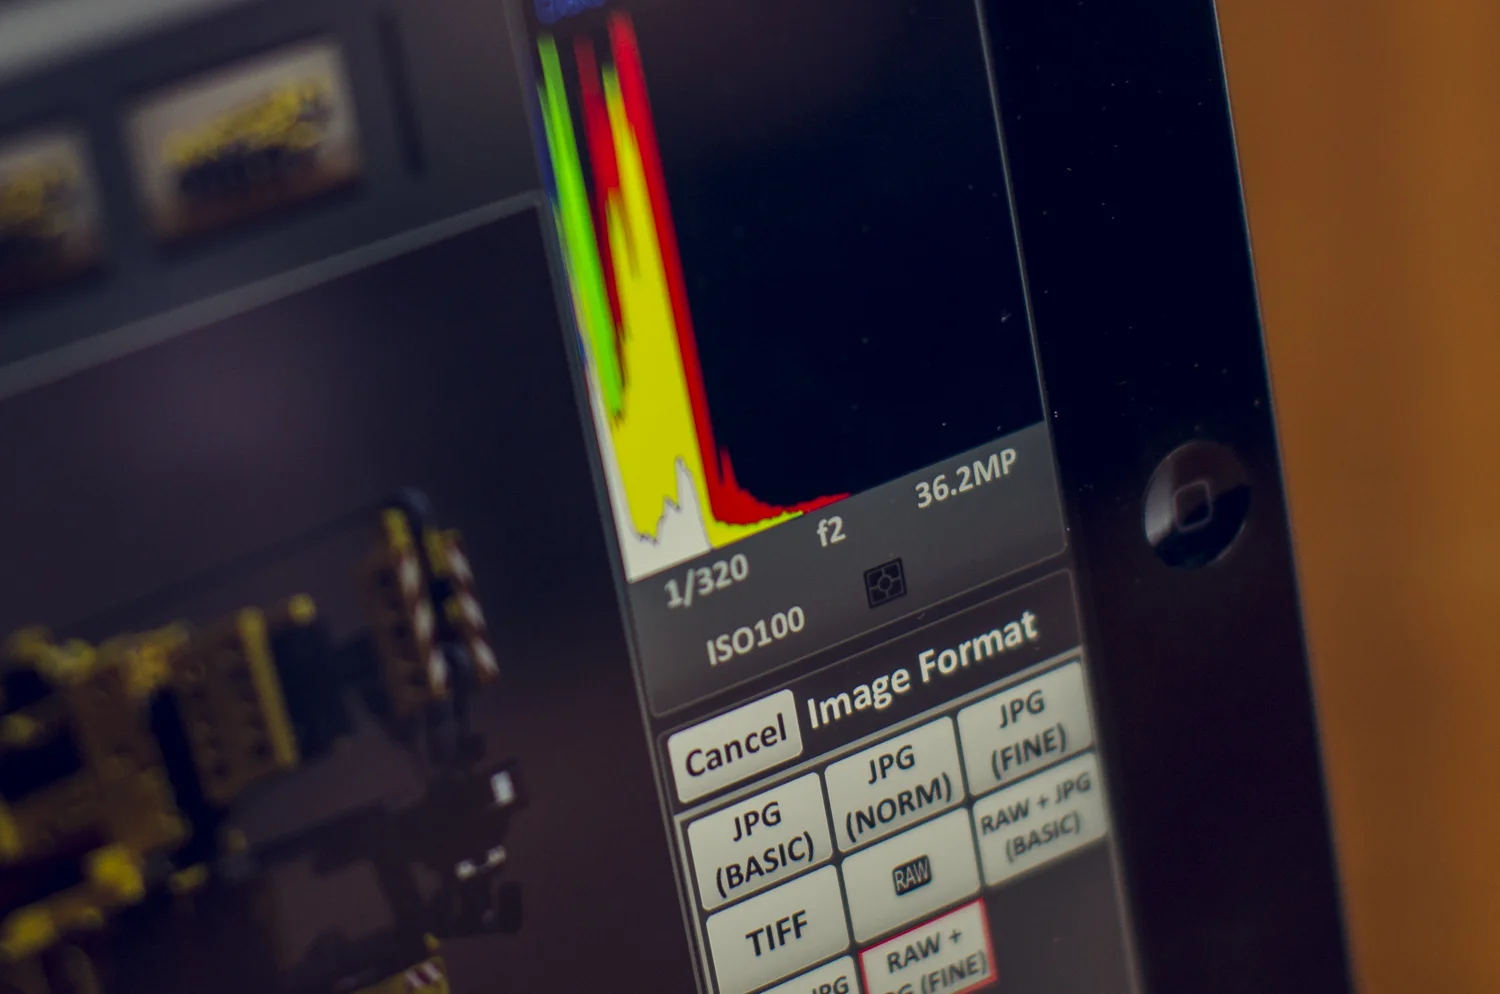
As you can see below, I did fine adjustments on the AF to shift the DoF around:

So this gives you super precise control over your focus, which can be very helpful when doing product work with a very shallow depth of field. I shot these on a 135mm F2 lens, so you can see that my DoF was absurdly shallow.

Something else that I can cover, with regards to focus, is the focus stacking. 

Focus stacking is a technique used primarily in Macro photography. When shooting macro images, it’s incredibly difficult to have a large depth of field, even when shooting with a very small aperture. This is due to the focal length of the lens (usually around 105mm), as well as the close proximity to the subject. 

The issue here is that you might want more in focus, but not have the ability to do so. This is where focus stacking comes in. Essentially, what focus stacking does is allow you to take the same image multiple times, but with a shift in your focus on every shot. This changes the position of the Depth of Field for every image, leaving you with a set of images that all have different areas in focus. Then you’ll bring the photos into photoshop (for example) and use all of those small areas in focus to create one image with a larger Depth of Field than what’s actually possible.

The old-school way of doing this would be to use a Macro Rail, which moves the camera for every image. This way is not ideal on any level, as you’re essentially changing your composition and perspective with every shot. 

The Camranger allows you to rack focus, and makes it really easy by automating the entire process for you. You can set it to adjust the focus in small, medium, and large steps. It can do 50 shots in a set, and if that’s still not enough for you, you can reinitiate the process and do another 50.

So, Macro shooters - this is pretty much a must-have device for you.


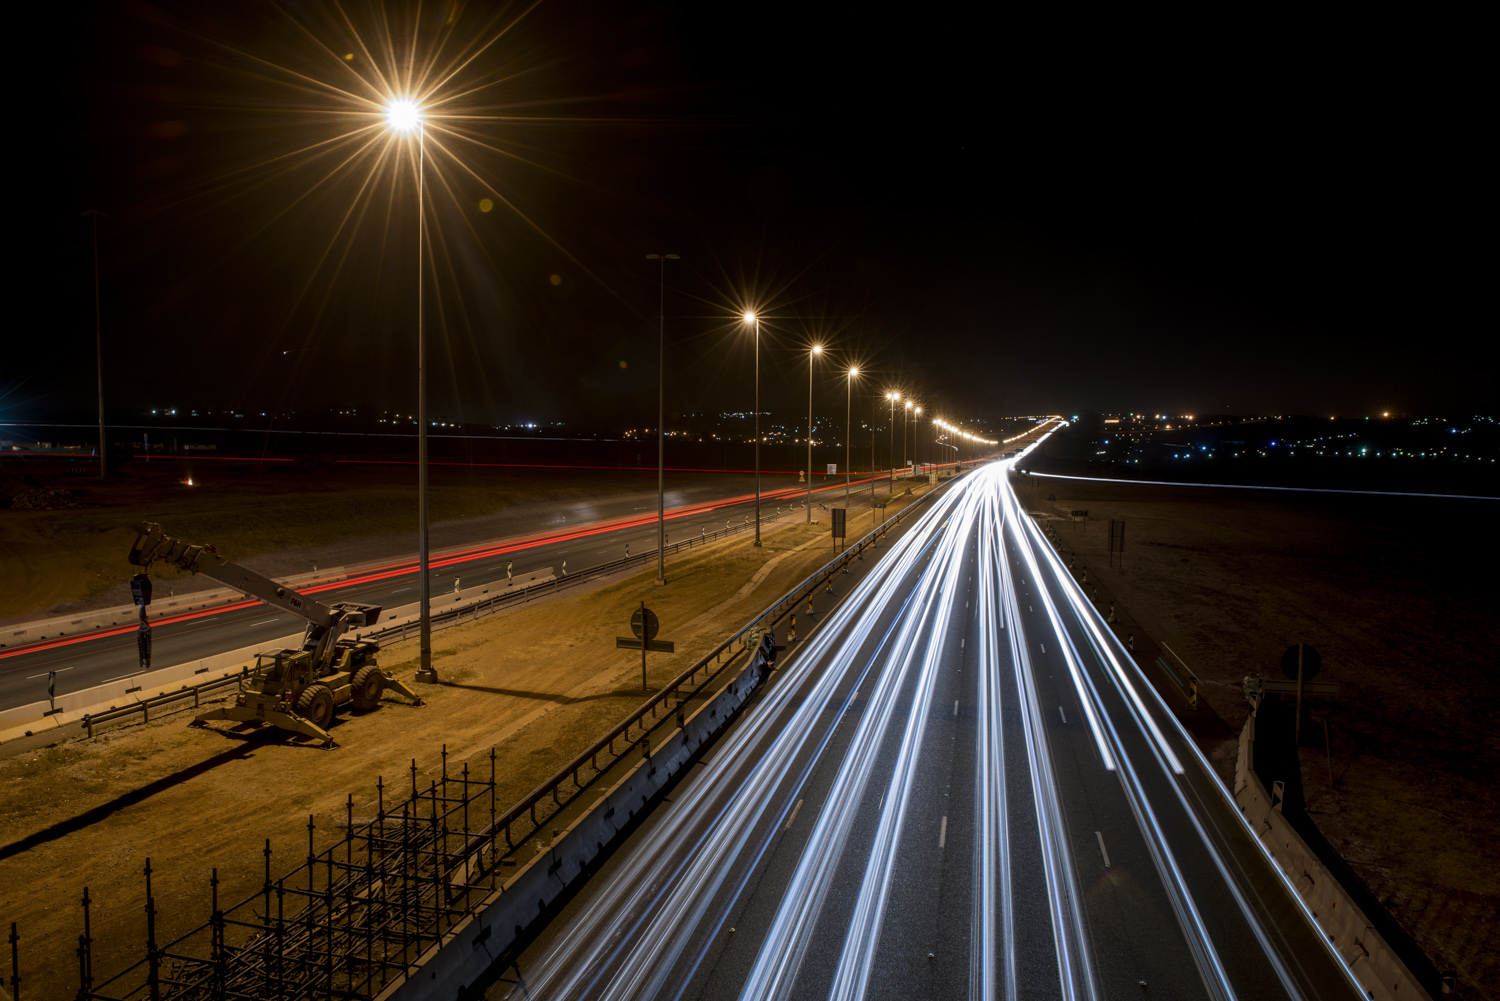
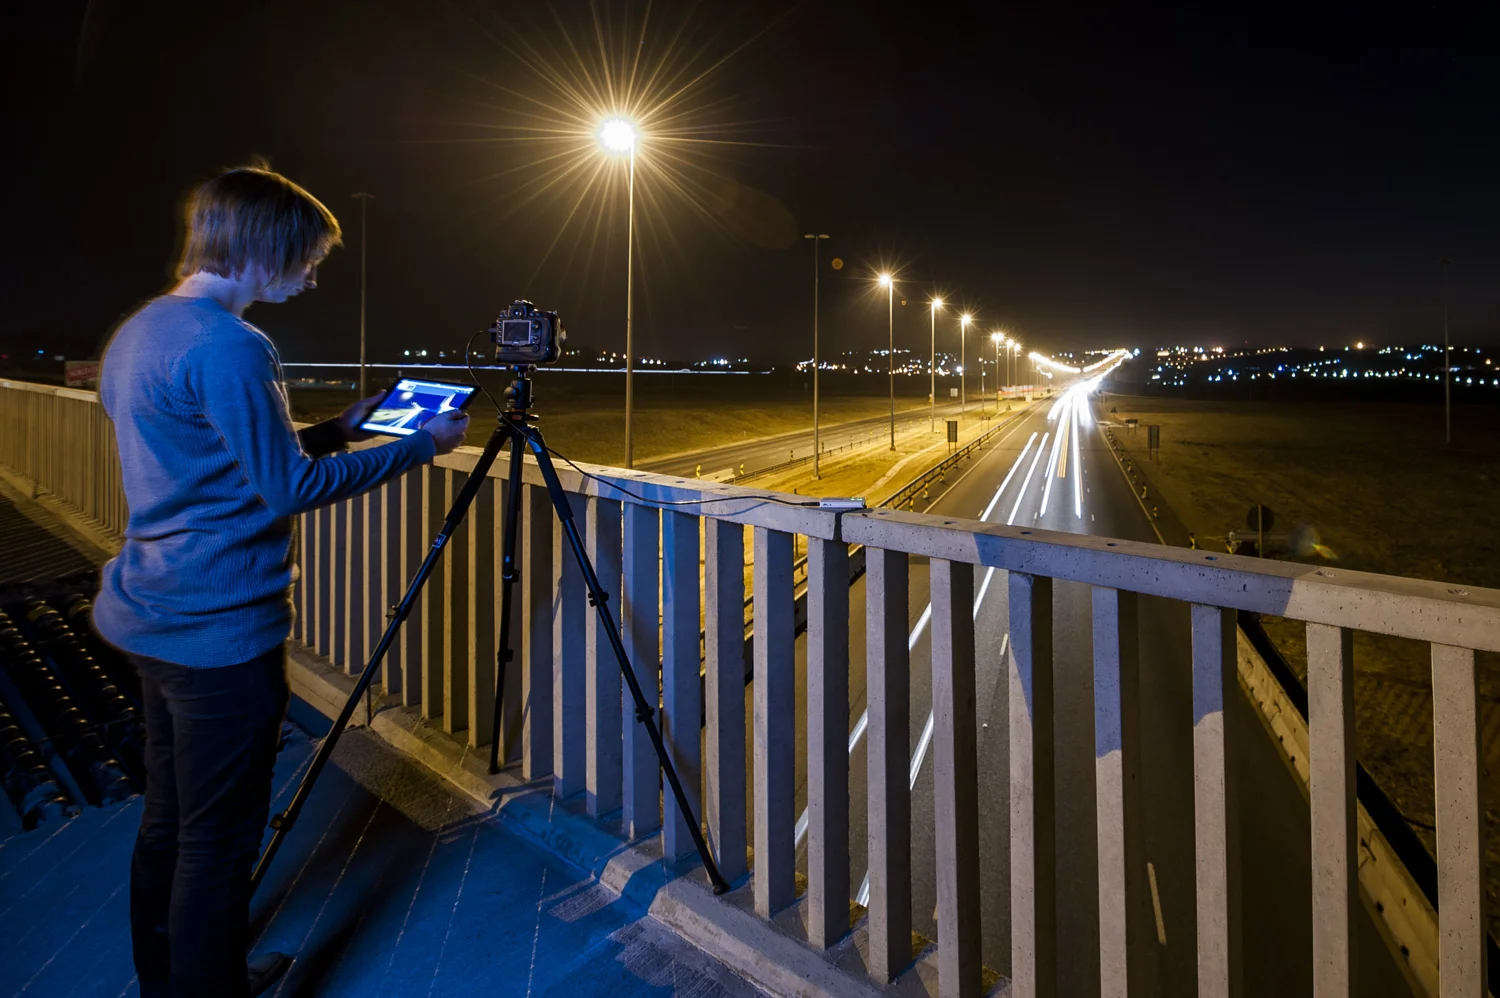
The next thing I want to cover is Timelapse. The CamRanger does a great job with timelapses, and it's an absolute breeze to set up. The controls are easy to understand, and it's just a matter of figuring out how you want your particular timelapse to look. Here are the possible configurations:

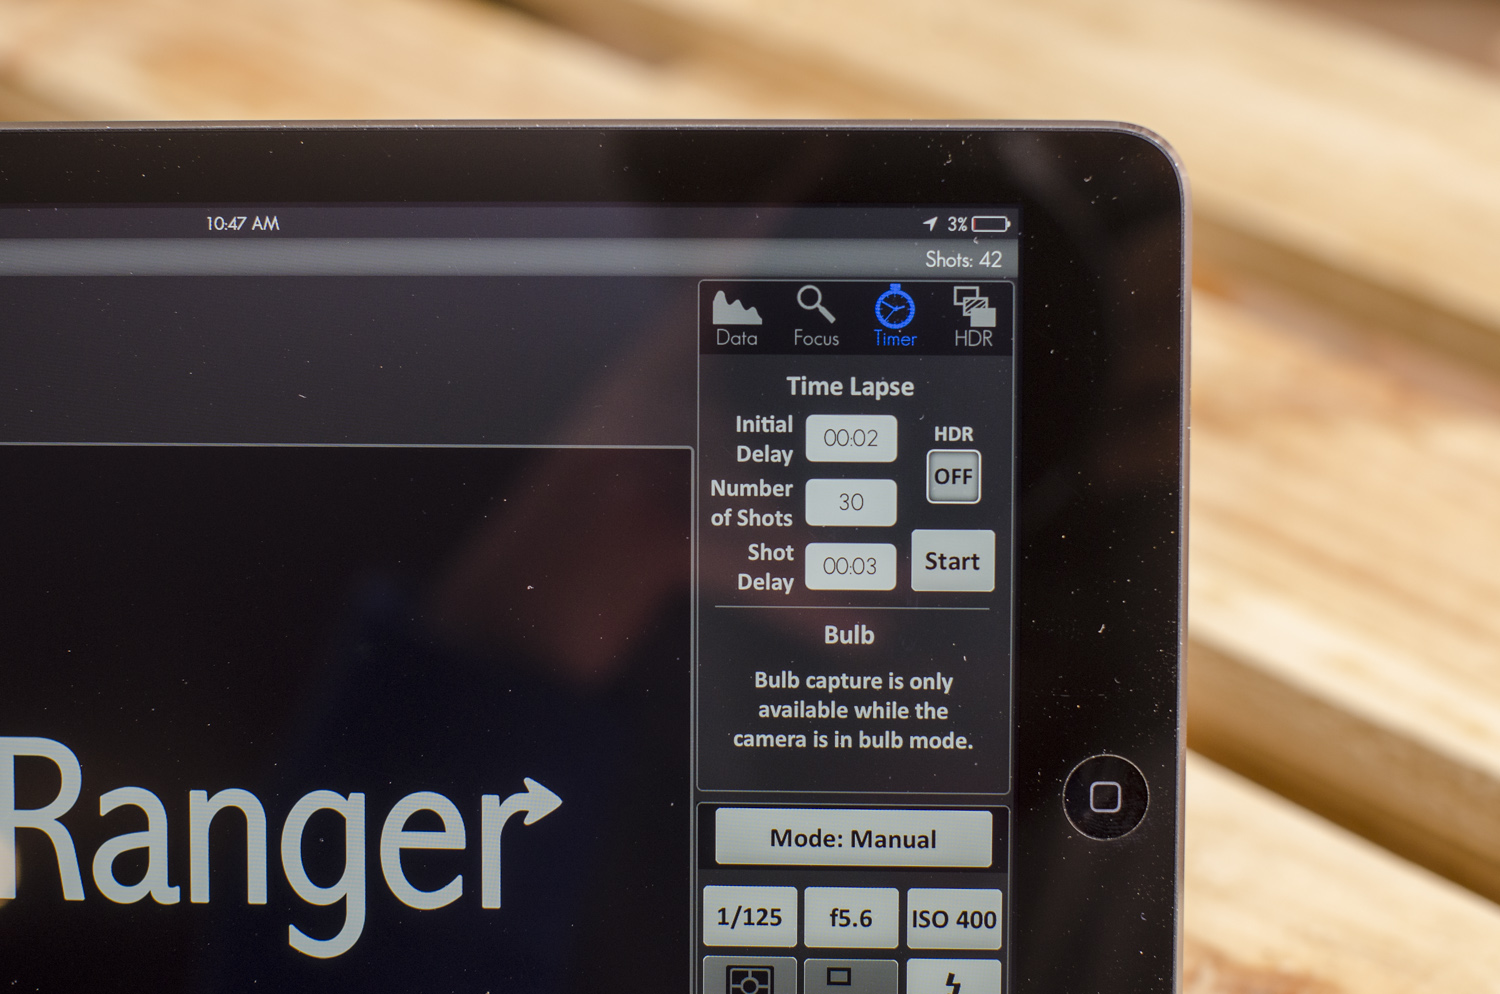
As a portrait photographer, I don't do much timelapse work, but I did do a timelapse of myself setting up for the photos above:

The CamRanger isn’t making the actual time-lapse video, though. It’s shooting the images so that you can make it yourself. Timelapses can be put together in Premier, Final Cut, and most other video editing tools.

The next thing I want to cover is HDR. The HDR capability of the CamRanger is fantastic.

Not only does it allow you to define the exact details of the bracketing it does, but you can also choose which settings are adjusted for the different exposures. You're not stuck to shutter speed as you are on many DSLRs - you can bracket using your shutter speed, aperture, or ISO.

This will be especially handy if you're in a very low light environment, where bracketing shutter speed might not be ideal, but where you have a lot of headroom with your ISO. Bracketing with your aperture probably isn't a great idea, as that'll affect your focus as well, but perhaps you could use it on a massive landscape shot around f/22, if you really need to.

Something else I’d like to mention is that in aperture mode, you can adjust the increments in exposure by 1/3, 2/3, and 1/1 stop increments. This allows for some pretty ridiculous bracketing. I measure that on a lens that’s got an aperture range of 2.8 - 22, you can get 19 different images. 19 images on a single HDR?! What is that… 18 million stops of dynamic range? That’s like trying to get detail on the sun and detail in the pitch blackness of space in a single image.

Obviously, The CamRanger is only shooting these files for you. It’s up to you to put them together in post. You can do this in Photoshop.

That's all I'm covering today. If remote control of your camera is something that appeals to you, there's no better device than the CamRanger. 

If there's anything that you'd like me to cover about the CamRanger, let me know!

Review: FLM CB-32F Tripod Ball Head

I recently got a suitcase full of overwhelmingly beautiful tripod gear to shoot and write a review about. There’s one specific thing I want to focus on today, and that’s the FLM CB-32F Ball head. I don’t think I’ve ever felt a small ball head that felt as solid as this one. 

The CB-32F is actually the strongest ball head in its class, and for its size (32mm), it can carry more weight than any 32mm ball head in the world. It can carry a load of 20KG, which is more than 99% of camera configurations you’re likely to use.

The friction control knob and clutch are very solid, and once you’ve tightened them, your camera isn’t going anywhere. 

The pan knob is a nice one to have as well, and allows you to easily pan your camera for panoramas. The base of the head has a measurement scale marked into it, allowing you to be really precise about the increments you pan in. They’re laser etched into the base at an angle as well, allowing you to view the measurements from above.

Something that really struck me about this ball head was the overall build quality. FLM uses high-tensile, lead free aluminium, which is machined using state of the art CNC technology, and I’ll be honest with you - you can feel it when handling this ball head.

I also find it really beneficial to have a separate base to the rest of the tripod. Once you've got your vertical angle and tilt dialled in, you can still rotate your camera horizontally without affecting those settings. This is invaluable if you're doing panoramas, or shooting architectural work.

The head also features a reversible screw which can be easily switched from 1/4” to 3/8” threads. This allows you to join virtually any Quick Release or Power Release System to the ball head. The head also has a cork surface on the top which increases the friction between the head and the Quick-Release, making it just that much more secure. The cork also helps reduce vibrations between the head and the Quick-Release.

The way the friction knob works is also a thing of beauty. It's has a step ring, which allows you to set a minimum tension  to hold your specific camera setup in place. This allows you to change your  composition without adjusting the friction.

That's it. Keep well, keep shooting. Hit me up on Facebook, Twitter, or Instagram - Ett Venter.

Getting to know the CamRanger - Part I

I’ve recently partnered with CamRanger SA and Sunshine Company down in Cape Town, and it's been a good ride. I've been playing with the Camranger for a few weeks now, and man, is this thing powerful. 

The CamRanger allows you fully to control your camera from your iPad/iPhone, wirelessly. And when I say “fully”, I’m not kidding - you’ve got full control over the exposure controls, as well as shutter release control, HDR, time-lapse, and even fine focus control. It’s pretty amazing.

Over the next few weeks, I’ll be teaching you how to use the Camranger. I’ll start off today with the basics. So let’s jump right in.

The CamRanger connects to your camera via the USB port (the one you’d normally tether with). Once you plug the CamRanger into the USB port on your camera, you’ll need to download the CamRanger app from the App Store. Don’t worry, it’s free.

Once you’ve got the App installed, just follow the instructions to get the CamRanger hooked up to your iPad. It’s pretty straight forward.

So here’s what you should be presented with, more or less:

This panel on the right is essentially the main control panel. Here you’ve got full control over everything you could want to control on your camera.

If you’d like to change on of the settings, you just tap on the setting, and the control panel will change and display the various settings you can change that variable to. Something important to note is that you’ve got the ability to see a live feed directly from your camera using the live view button in the app.

Something else you can change (and something I’d encourage you to change) is the quality setting. Along with shooting in RAW (which you should always be doing), you can set your camera to shoot JPEGs as well.

This might not be something you do when you’re shooting without a CamRanger, but when you are, it would be a wise decision to create low resolution JPEGs along with your RAW files. The reason for this is that if you only shoot RAW, the camera is going to send full-res files to the CamRanger, which will increase the transfer time. In my case, my 36MP D800 files take so long that it makes using the CamRanger an incredibly exhausting experience. The moment I have the camera creating small JPEG files, the transfer between the CamRanger and my iPad is significantly faster, as now the files being transferred are only 9MP.

Once you’ve got your settings dialled in, it’s time to pick the point you want to focus on, which is as easy as tapping on that point on the screen. Once you tap on the screen, the CamRanger takes control of the lens' autofocus motor and makes the correct adjustments. How nuts is that? You can also double tap the screen to get a 100% zoom to make sure you've nailed the focus.

So that’s it! Using this CamRanger is a piece of cake. It’s a good, solid setup that I find to be incredibly reliable.

The range on the wireless network that the CamRanger sends out is big as well. I did some long exposure work a few nights ago, and ended up standing on almost the opposite side of  a highway I was photographing, while I was controlling the camera from my iPad. 

So here’s the image I shot for this tutorial. I did 100% of the control in this shot on my iPad. In fact, I even composed the shot using my iPad, without looking through the viewfinder in my camera (or using liveview) once.

In the next tutorials I’ll be coving the finer focus control, Focus Stacking, HDR, as well as Timelapse, to name a few.

The Profoto Situation, Part II

So, remember that issue I posted about last week, with my Profoto B1 light? If not, read about it here.

In a nutshell:

  • I bought a Profoto light for a stupid amount of money, because Profoto lights are amazing
  • My Profoto light broke from pretty much nothing, because the case was defective
  • I sent it in, they refused to fix it and wanted me to pay for it
  • I complained about it on twitter, Profoto (Global) said they agree with the assessment
  • I wrote a long-ass blog post about it and it gained some traction on the web

So, after that, I told the local Profoto guys to fix the light at my expense. They then dropped me an email saying that they "are under rule from international standards for their warranty on all their Profoto Equipment. There are some hard costs that they need to pay regarding my repair, but to ease the costs of this repair and to show their good faith regarding my unit, they are willing to give me a 5% discount on my next Profoto purchase".

Errr, I don't know how 5% is supposed to make me feel better about Profoto refusing to acknowledge that their light is faulty, but thanks, I guess? 

Now, as I said before, my next Profoto purchase would be an octa. I don't need another light. The Octa is somewhere around R6500 here. 5% of that is R325. For the foreigners - that's like $30.

Thirty. Dollars.

Sure, I could use that 5% when I buy another B1, but that's never been my next planned Profoto purchase. 

Now, I'm not complaining about the 5%. It's only 5%, which doesn't mean much on this scale, but whatever. Money isn't the issue here. So, thanks Profoto for the 5%. It's certainly better than nothing, but it sure as hell doesn't make me feel any better about the fact that they refused to fix my light. 

Now here's where the story gets absolutely nuts. And I'm sorry, but this is where my tone will stop being as warm as it's been, and as it was in the last blog post.

I got an email from who I believe is the head of Profoto here in South Africa. The email started off nice and friendly. Stuff like "We're glad you chose to accept our 5%", and "Even though the repair assessment didn't go in your favour, we strive to give our customers the best service", blah blah blah. And then, the winner - Are you ready for this? I hope you're sitting down for this one:

"We kindly ask that you respond on your Blog and social media posts to also include the courtesy offer from our side to give additional discount. No mention of this has yet been made and we would like for you to conclude this matter now  with some positive feedback. We believe in building bridges here, not burning them and we could very well see a strong relationship with you in future".

Okay, so let me just wrap my head around this one. They refuse to fix a light that should never have broken, I complain about it on the web, a stack of people see me complaining (Including Profoto), they then offer me pocket change for a discount, wait a couple of days, and then ask me to blog about "their courtesy offer"? Seriously? It feels like Profoto is trying to buy some good rep from me. 

Sorry Profoto. I'm not on your payroll. I'm just an artist trying to make beautiful photos. I'm not sponsored or endorsed by you guys, and you absolutely can NOT buy a good blog post from me. Want a good blog post? Acknowledge the fact that your light was defective. Don't throw a few bucks at a photographer that spent $2500 on your light and think that you can buy some good rep.

Geez.

Anyway, let me end this post with this: Despite all this crap, and despite the fact that I've pretty much lost all respect for this company, I still believe that their lights are amazing. I'm still happy that I bought the B1, and as I said, I'll probably still buy more Profoto stuff. But the people behind Profoto need to reassess the way they run this company.

Anyway, that's my rant. 

My bad experience with Profoto and my flashy new B1.

Off-camera lighting has been a big part of the way I make photos since almost the very beginning. I've always loved lighting my shots well, and I can pretty comfortably say that no less than 95% of my work is artificially lit. Until just recently, I've been doing all my work with speedlights. In fact, 100% of the work on my website was done with speedlights. However, I recently decided it was time to upgrade, and invest in something a little more powerful and supposedly robust. Since the upgrade, I've been both impressed, and incredibly disappointed. Here's my story:

Introducing the Profoto B1 Air:

This light is an absolute game changer. It's a full-on 500W studio light, but it runs on a small battery that clips into the light. No packs, no mains, no nothing. Just a monster 500W light that can do 220 shots on full power. I hardly ever go above 1/8th power on a speedlight, so this B1 pretty much lasts forever with me. And at 500W, it's powerful enough to light a small fishing village.

It's solid, it's powerful, it's reliable, it's convenient, it makes it easier to get the job done. On paper, it's the perfect location light. I honestly couldn't ask for a better light. This light is the perfect, perfect light for the work I do. So I bought it. Here in South Africa, the light costs R27 000 (+- $2570). I bought it before a recent price jump for R25 000. 

Just take that in: R25 000. That's enough to buy a cheap car. And that's R25 000 before the R4000 trigger, which is a standard platform independent trigger, by the way - not the regular awesome Profoto trigger that allows you to control the power of the light (there's no Nikon version yet). This is also before the R6000 - R7000 octabank I need to buy to replace the 5' octa I use at the moment, or the R1500 speedring I need to buy to make my current octa work. The trigger and the octa/speedring were purchases I knew I'd have to make, though, so I'm not complaining about that. I'm just emphasising that when I bought this light, I knew it was going to end up being a R30 000+ investment, one I was willing to make, because Profoto lights are supposed to be those lights you buy once and use until your arthritis stops you from pressing the shutter release.

So, how did I justify buying this light? Well, it's more power than I'll ever need on-location, it's a quick setup, and Profoto lights last forever, right? They're industry standard, right? They're some of the most robust, most solid lights in our industry, right?

Yeah, that's what I thought too, until I took it out of my bag one afternoon and found this:

Yeah, that's a crack. That's one big-ass crack. The light still works perfectly, but it's got one massive crack in the casing. I found that after having the light for about 6 weeks, and having used it all of about 10 times. Now, I'm the first one to admit that gear of mine has a bit of a rough life. I've had my gear ruined by being blown over by the wind or dropped before. In fact, my previous octa got so destroyed at a shoot I did that I took it off the stand and threw it in a bin right there on the sidewalk before grabbing another out the car. One of my speedlights is held together with two hair elastics because I dropped it on the first shoot I ever did with it. I've got no problem admitting this stuff, but I can tell you with absolute confidence that this Profoto B1 has never been dropped or taken a knock, let alone one that could cause a crack like that. It's never blown over, it's never been dropped, nothing. In fact, most of that light's life, it stood on a C-Stand in wedding receptions pointed at the ceiling because I haven't sorted out an Octa for it yet. The light is absolutely spotless apart from the crack. No scratches, no marks, no bumps, no nothing. Have you ever even heard of a cracked Profoto light? Aren't these things supposed to be tanks?

The only way that crack can exist is if the light has some sort of manufacture fault and that it cracked while being transported or something. I don't know exactly how, but I know for sure that there's no chance that the B1 experienced the kind of trauma necessary to crack it's casing like that. Now, I don't blame Profoto for a moment for having a light out in the wild that has a fault in the casing. That's going to happen to every company. But what absolutely grinds my gears is that Profoto isn't interested in fixing this thing. I took it back to the store I bought it from, and the guy at the store said that he'd "never seen anything like this", after which he took the light from me and sent it down to the local Profoto distributor, who says I need to pay R1241 to fix the light. I contacted a global Profoto rep who essentially told me "Yeah, sorry bro but we're happy with the assessment made on your light".

So here's my gripe. The light either has an incredibly poor build quality that is surpassed by the $140 LumoPro speedlights I had when I was starting out, or there's a fault in the casing and Profoto is not willing to accept it. In the case of the former - why the heck did I spend R25 000 on this thing?

Now, I'm not going to sit here and tell you that I'm not going to fix the light or that I'm not going to buy a Profoto light again. Of course I'm going to fix the light, and I'm sure I'll buy another one sometime soon. Profoto has the reputation it has because it's products really ARE that good, they really are that robust. I was just unlucky on this one and got a bad light. I just wish Profoto would accept that.

So, if you ever decide to buy a Profoto light, know that you'll probably get a fantastic light. Also know that you might get customer service that'll make you want to throw the light at someone.